

STEP 1: Check for Damage
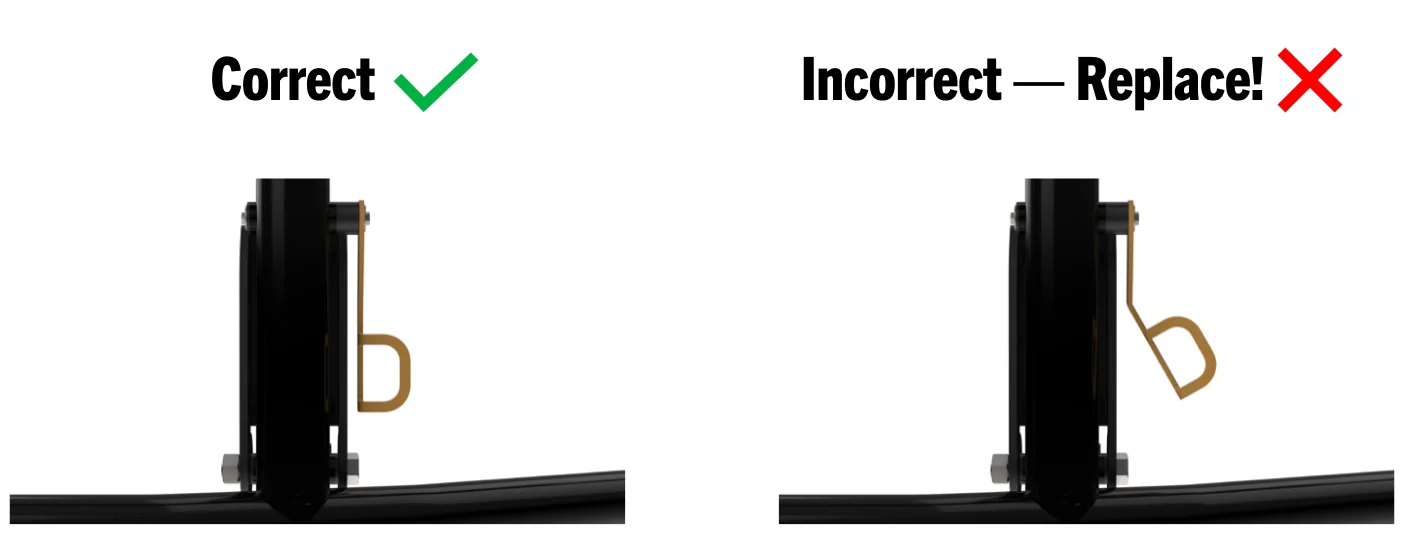
Check Handle for Damage: If the handle is bent or broken, replace immediately. Contact your local dealer or Ex-Guard directly - [email protected] | 888.902.2777.
XG & EX GENERATION 3
Published latch, handle and U-bolt inspection reference for XG and EX Generation 3 guards.
Inspection schedule
Before Each TripBEFORE EACH TRIP
Use the links below to move through the published inspection procedure in its original order.
Check Handle for Damage: If the handle is bent or broken, replace immediately. Contact your local dealer or Ex-Guard directly - [email protected] | 888.902.2777.
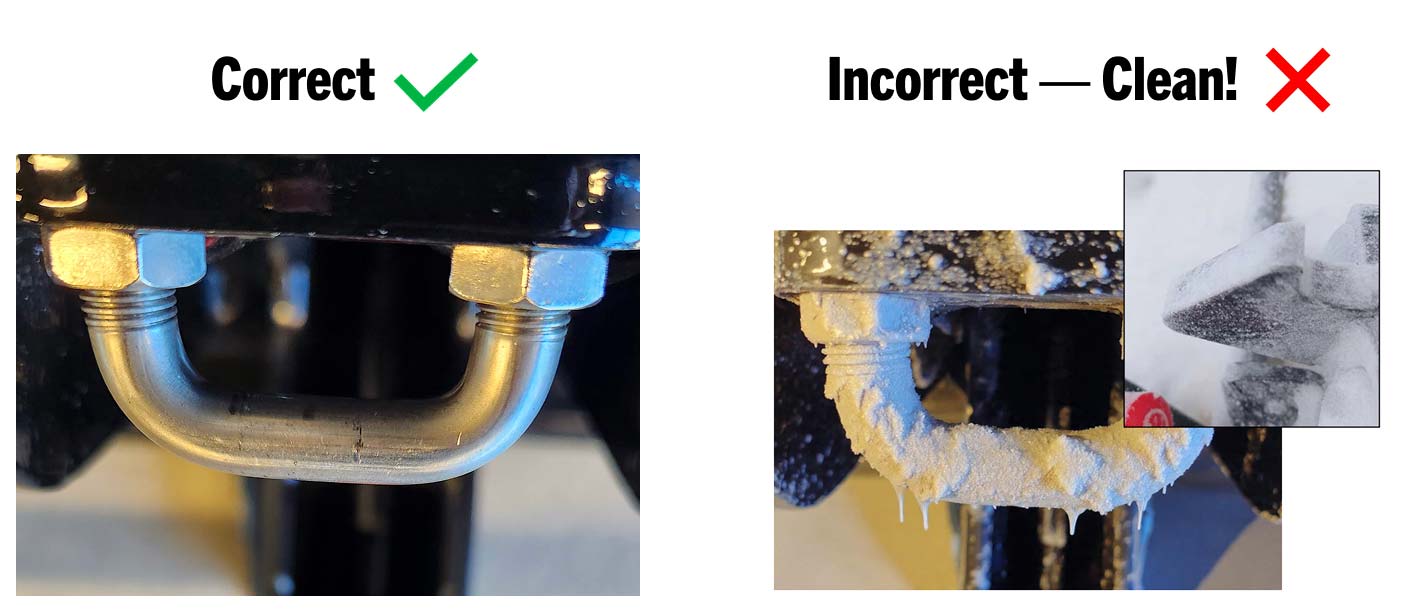
Check Latch for Debris: The latch must be clean and free of ice, snow or road grime.
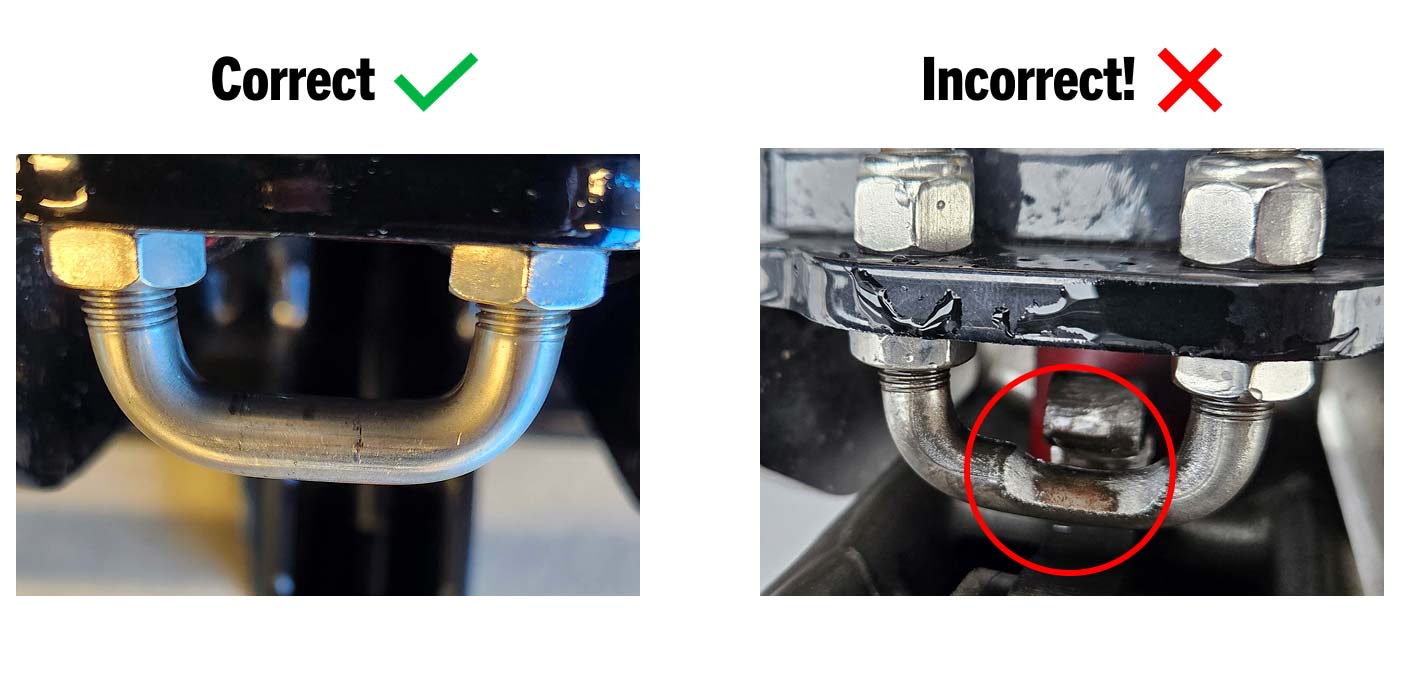
Check Latch Hook for Wear: If the latch hook is damaged or worn, replace it immediately.
NOTE: This wearing is a direct result of tension variance between the driver and passenger side latches. Replace U-bolt and refer to Step 6 to correct this.
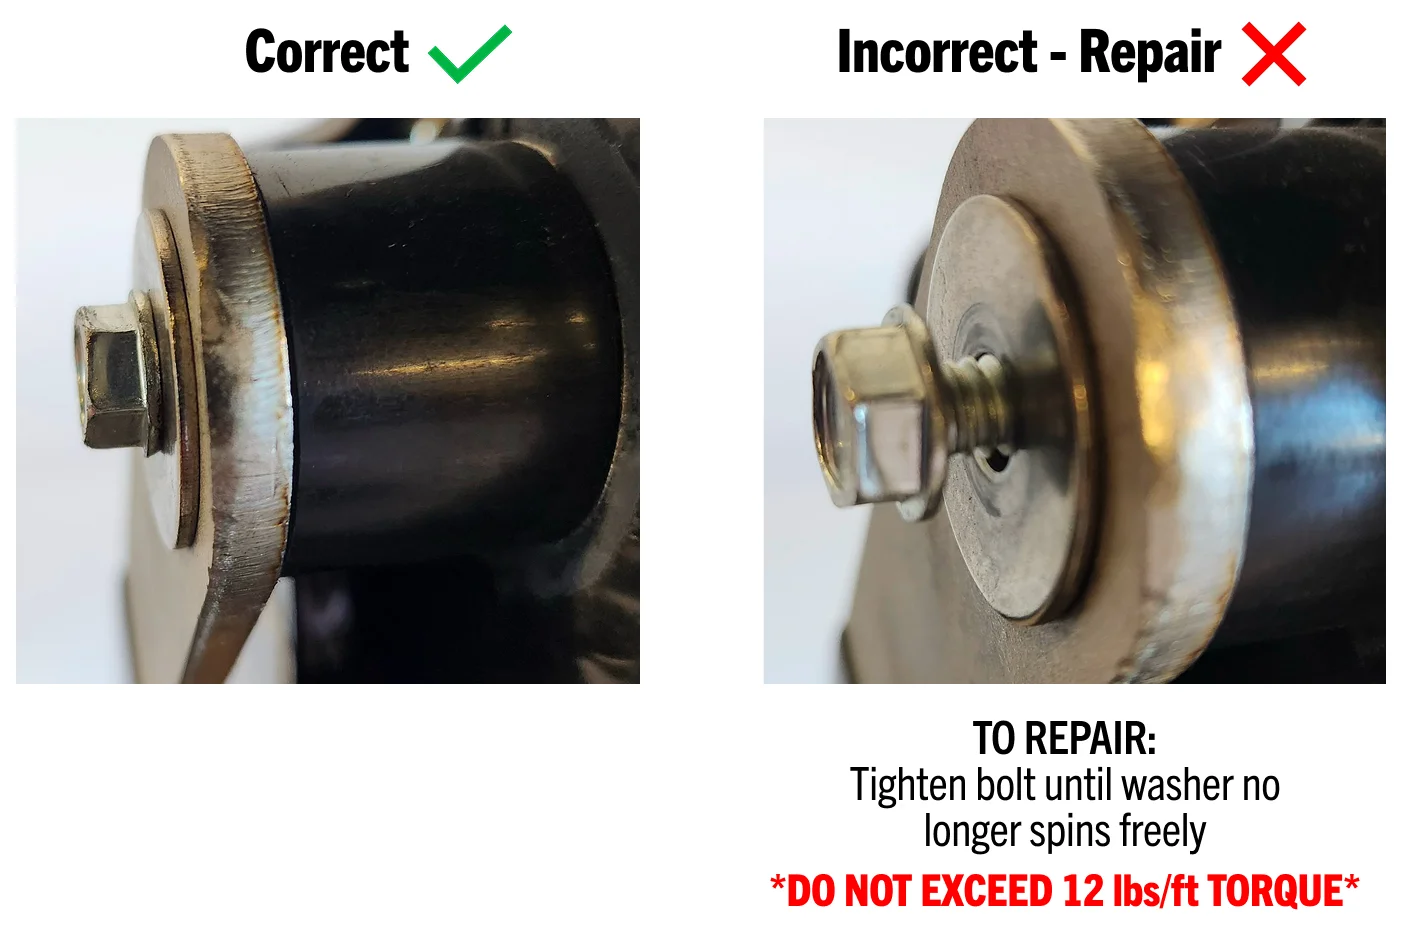
Ensure Handle is Securely attached: If the washer spins freely or threads are exposed on the handle bolt, remove the nut completely and apply high-strength Threadlocker to the threads before re-torquing to 12 lbs/ft.
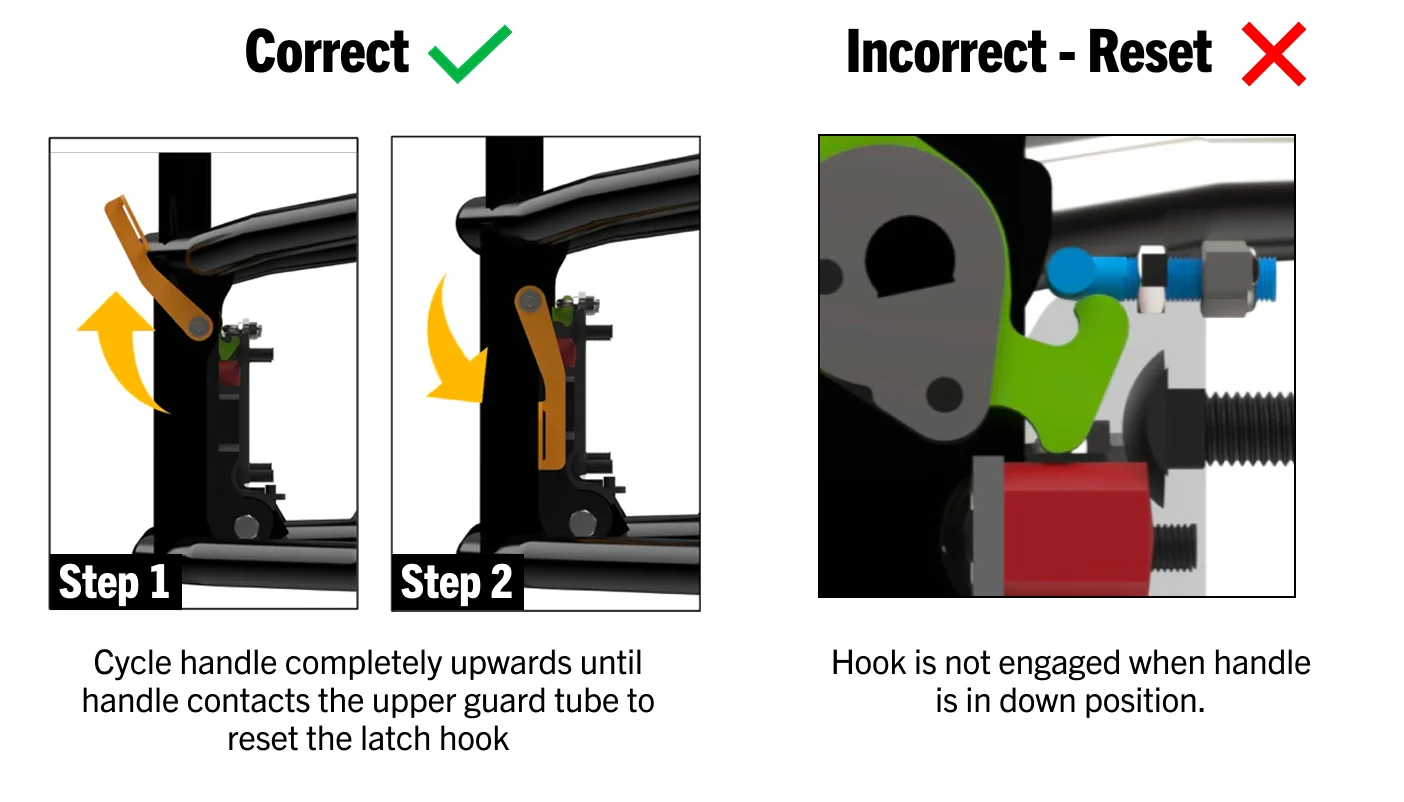
If the handle is not parallel with the upright guard tubing, the guard is not secured. There are two ways this can occur:
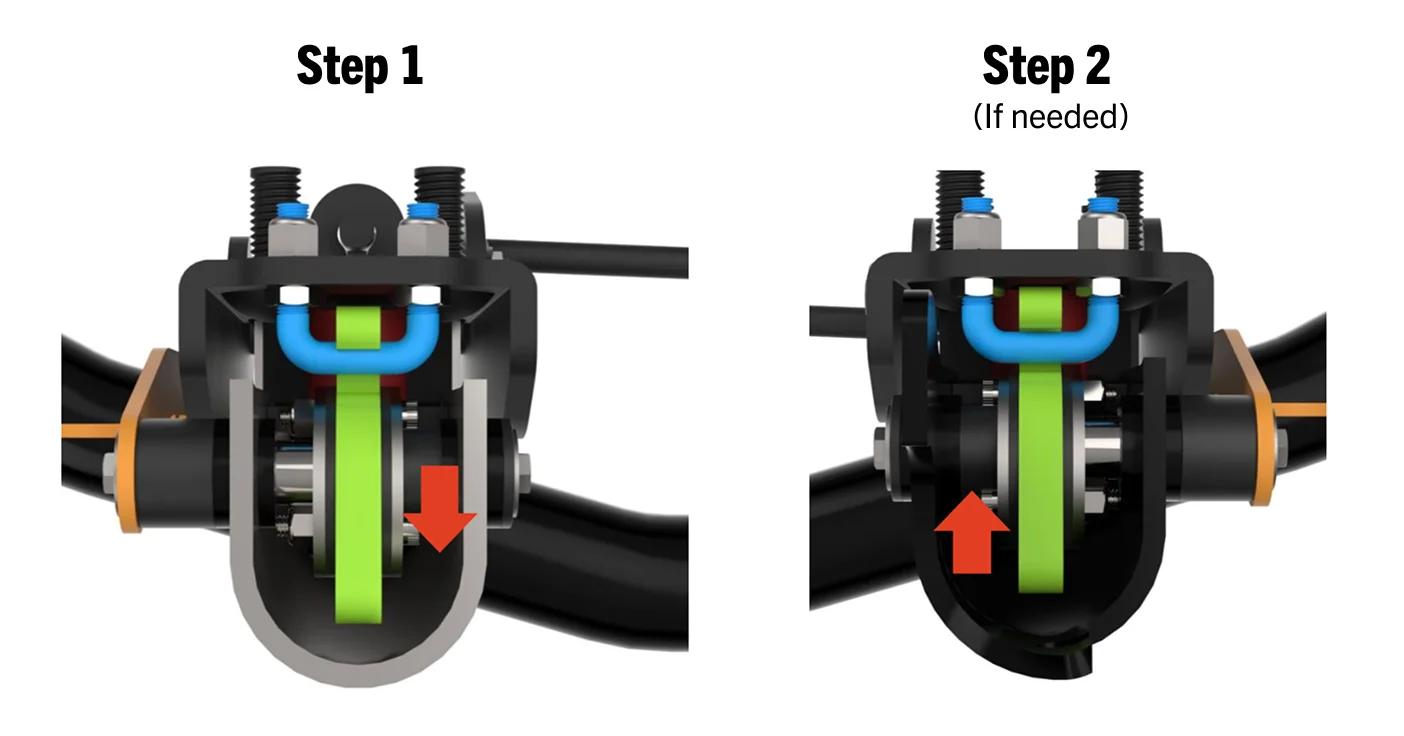
Ensure Latch is Engaged in U-Bolt Correctly: If either latch hook is not parallel to the guard when the latch is closed, see the Maintenance Guides.
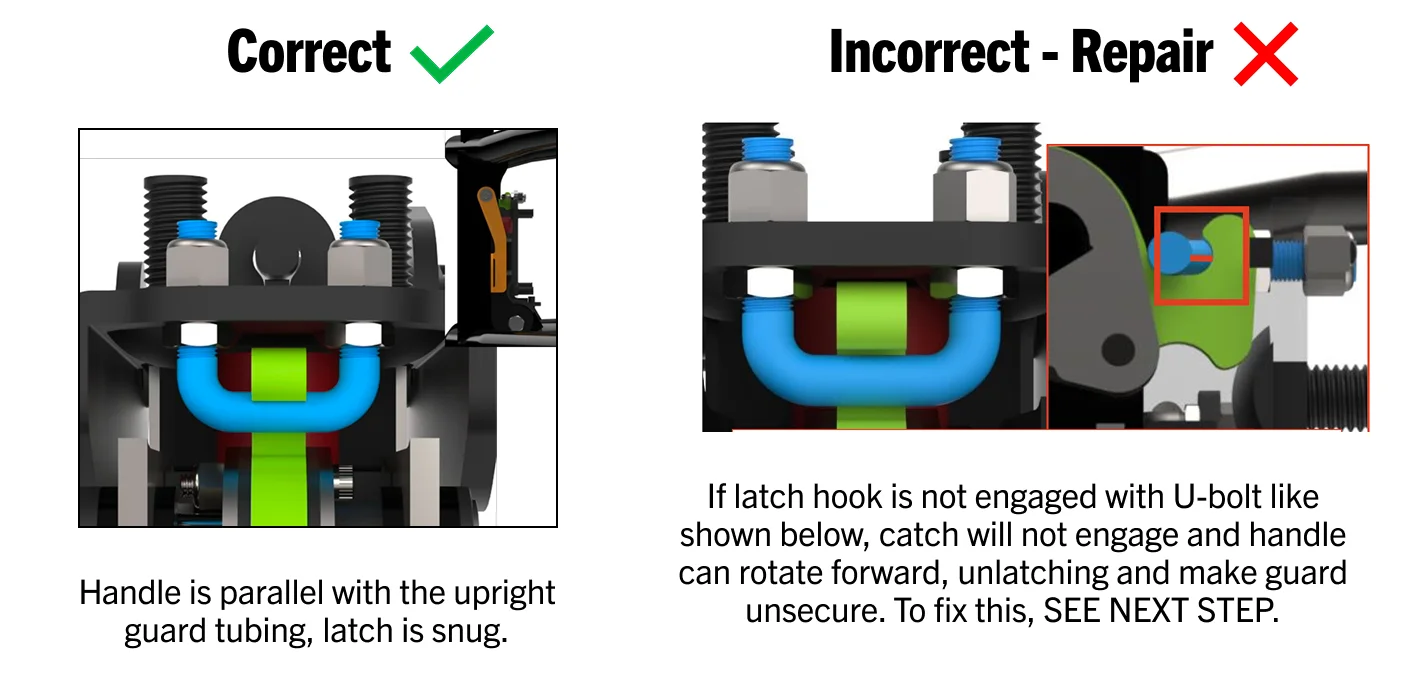
With both sides latched,