LEVRLock™ Generation 3 Pre-Trip Maintenance and Inspection Guide
Before Each Trip
IMPORTANT: THE GUARD MUST BE SECURELY LATCHED BEFORE USING.
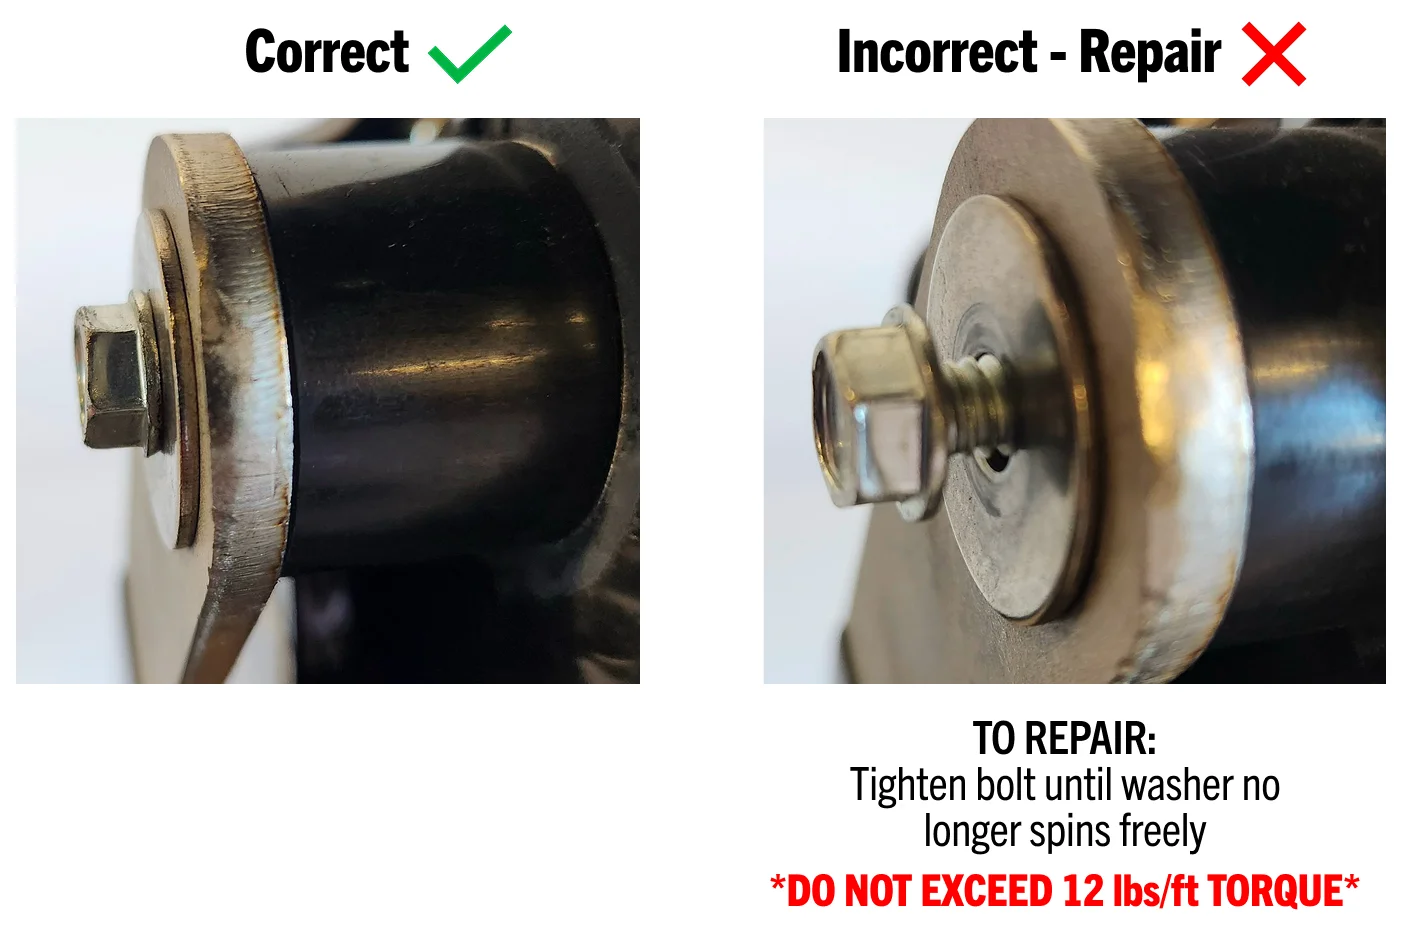
Failure to maintain and/or latch your Ex-Guard securely can result in damage, injury and even death. If any of the items below exist in your pre-trip inspection, repair immediately before using the vehicle or the guard:
STEP 1: Check for Damage
STEP 2: Keep Latch Clean
Check Latch for Debris: The latch must be clean and free of ice, snow or road grime.

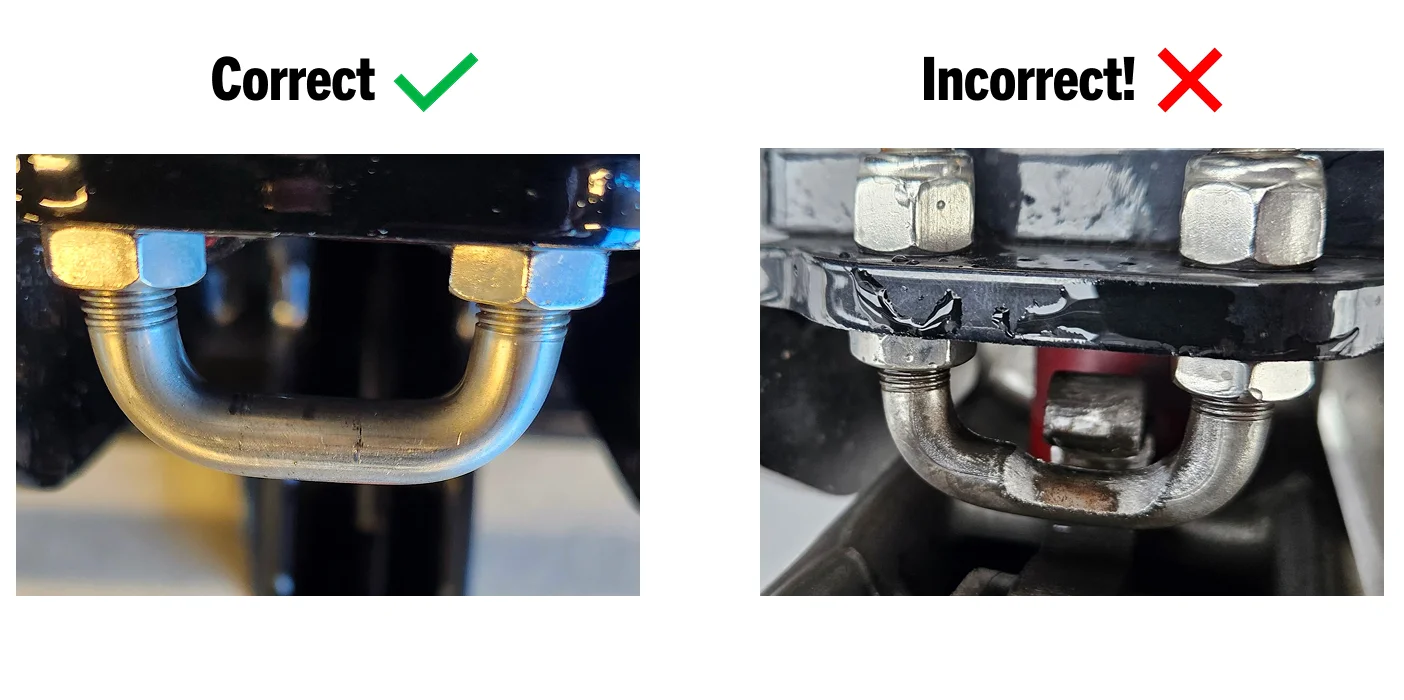
STEP 3: Check Latch Hook for Wear
Check Latch Hook for Wear: If the latch hook is damaged or worn, replace it immediately.
NOTE: This wearing is a direct result of tension variance between the driver and passenger side latches. Replace U-bolt and refer to Step 6 to correct this.
STEP 4: Check for Handle Movement
STEP 5: Check Handle to Ensure Guard is Secured
- The handle was not fully raised when opening so the catch didn’t reset, or
- The U-bolts do not have equal tension (see Step 6)
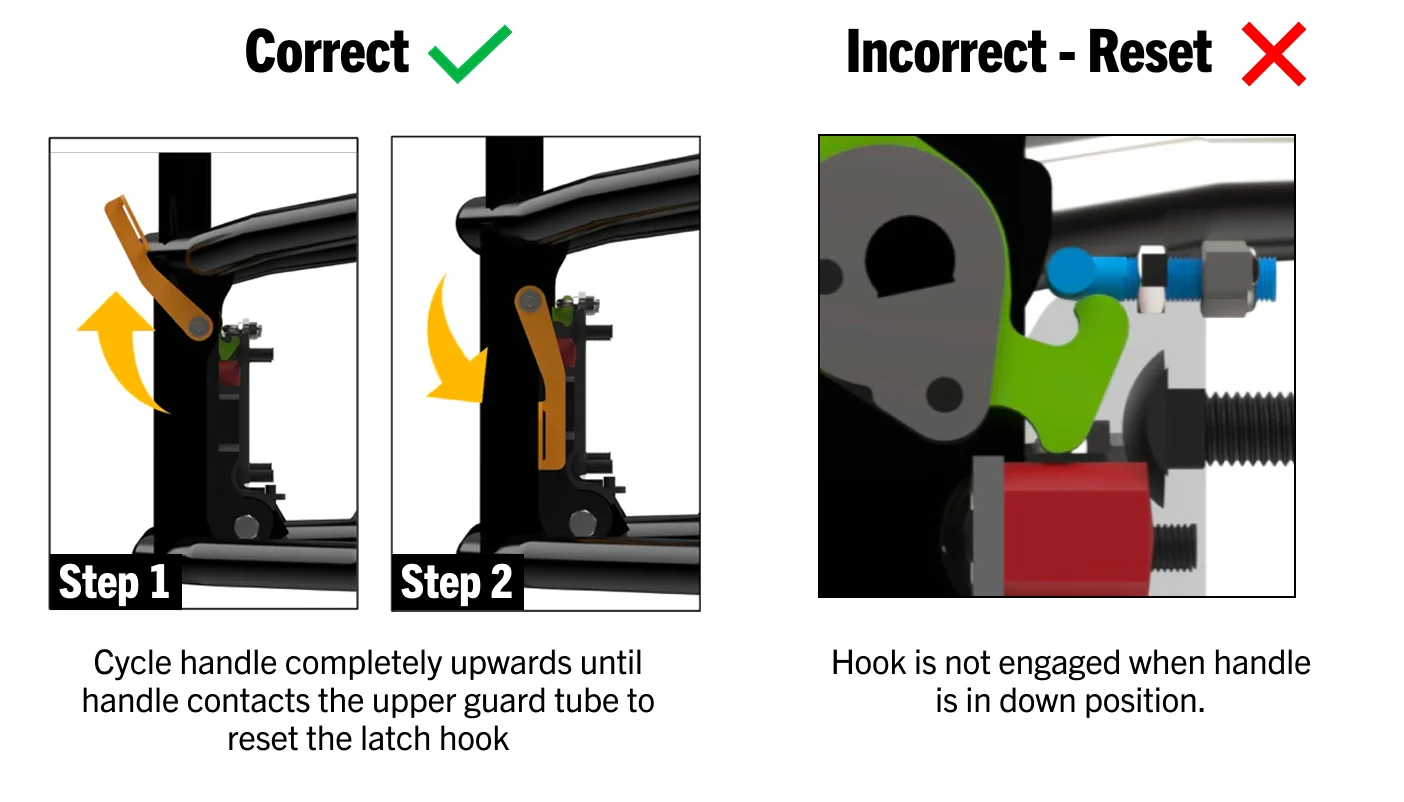
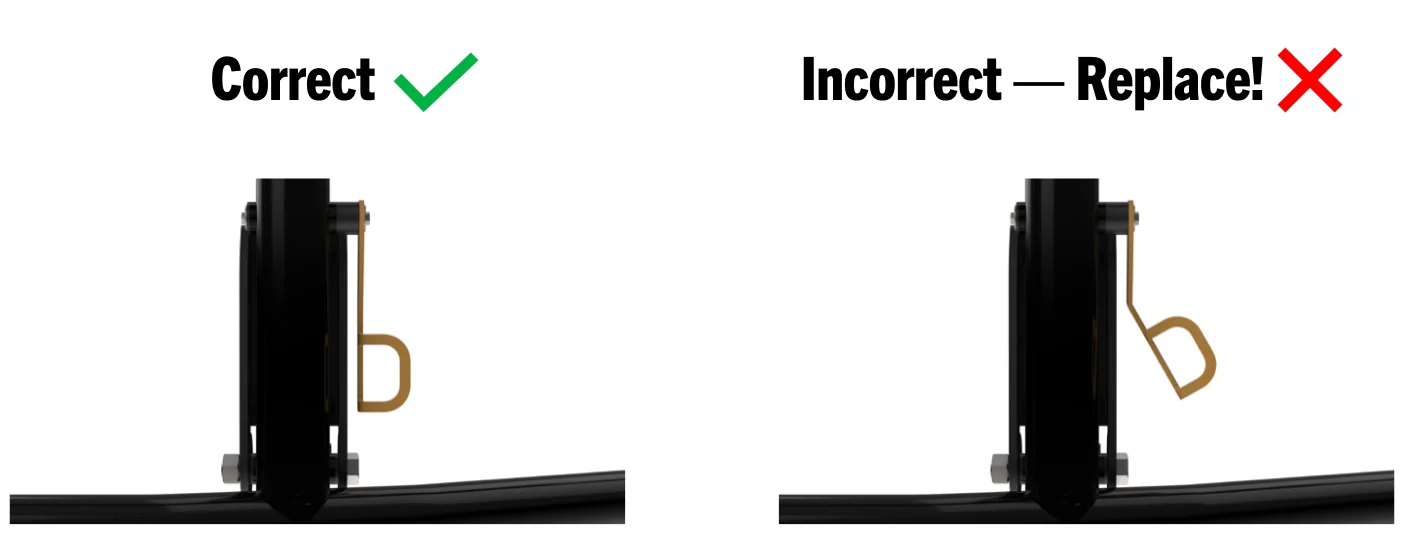
STEP 6: Check U-bolt & Latch Position
Ensure Latch is Engaged in U-Bolt Correctly: If either latch hook is not parallel to the guard when the latch is closed, see ex-guard.com/maintenance.
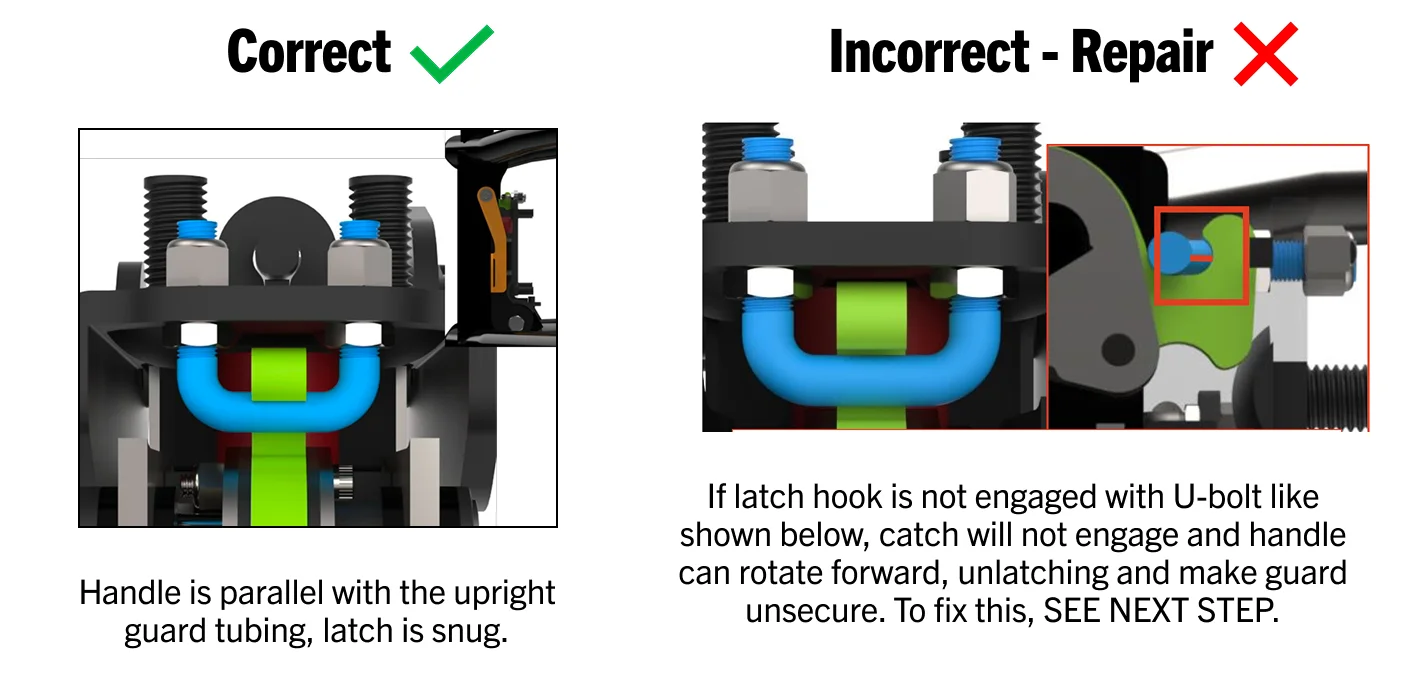
STEP 7: Corrective Actions for U-Bolt Alignment
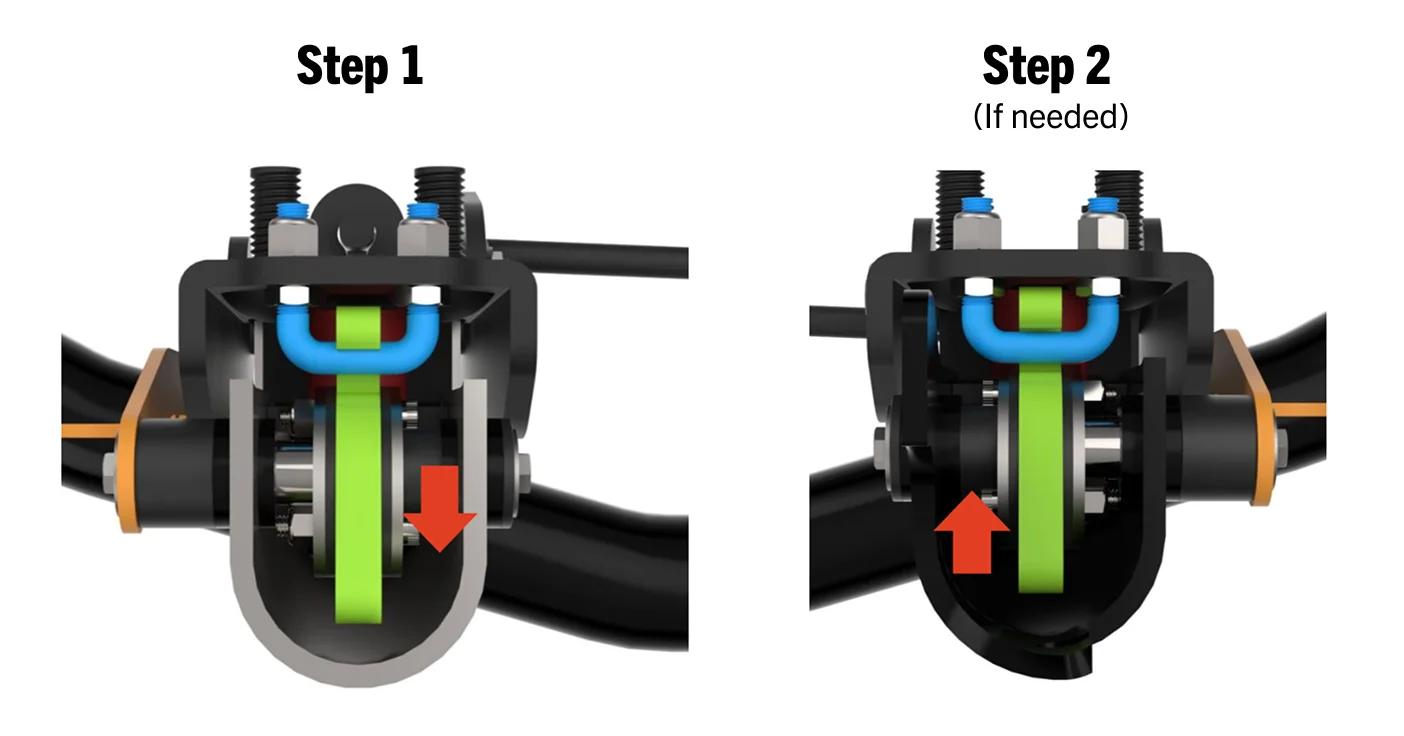
With both sides latched,
- Identify which side is correctly secured.
- Extend the U-bolt (loosen) on this secured, tight side to balance the distance on the opposite, loose side.
- Stop extending the U-bolt when the opposite side is corrected. *NOTE: If secured side loses tension and a gap appears, STOP and switch to the opposite side to TIGHTEN U-bolt so tension is even on both sides and latches are secured
